Introduction
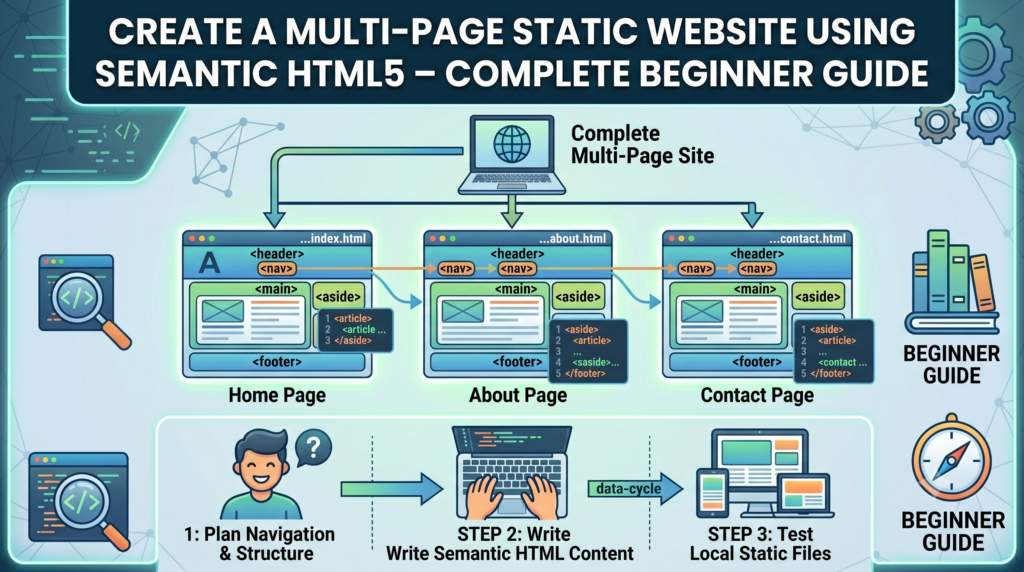
Modern websites are no longer built using only basic <div> tags and simple layouts. Today, developers use Semantic HTML5 to create structured, SEO-friendly, accessible, and professional websites.
In this tutorial, you will learn how to create a multi-page static website using:
- Semantic HTML5 tags
- Headings
- Forms
- Tables
- Lists
- Images
- Audio and video elements
This project is perfect for:
- Beginners learning web development
- Engineering and diploma students
- Portfolio projects
- Blogging practice
- Frontend development preparation
What is a Static Website?
A static website consists of fixed web pages created using:
- HTML
- CSS
- JavaScript (optional)
The content remains the same unless manually updated.
Examples:
- Portfolio websites
- College project websites
- Company information pages
- Landing pages
- Personal blogs
Why Use Semantic HTML5?
Semantic HTML5 tags clearly describe the purpose of webpage sections.
Instead of writing:
<div class="header">You write:
<header>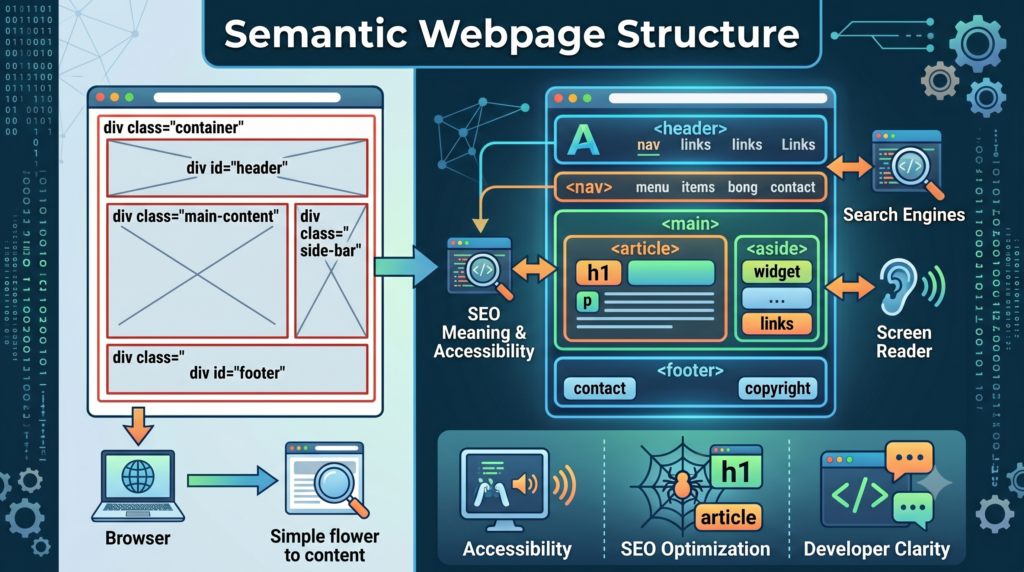
This improves:
- SEO ranking
- Accessibility
- Readability
- Code maintenance
- Browser understanding
Important Semantic HTML5 Tags
|
Tag |
Purpose |
|
<header> |
Website header section |
|
<nav> |
Navigation menu |
|
<section> |
Main content section |
|
<article> |
Independent content |
|
<aside> |
Sidebar content |
|
<footer> |
Footer section |
|
<main> |
Main webpage content |
Website Structure
Our multi-page website will contain:
project-folder/
│
├── index.html
├── about.html
├── contact.html
├── gallery.html
├── css/
│ └── style.css
├── images/
├── videos/
└── audio/

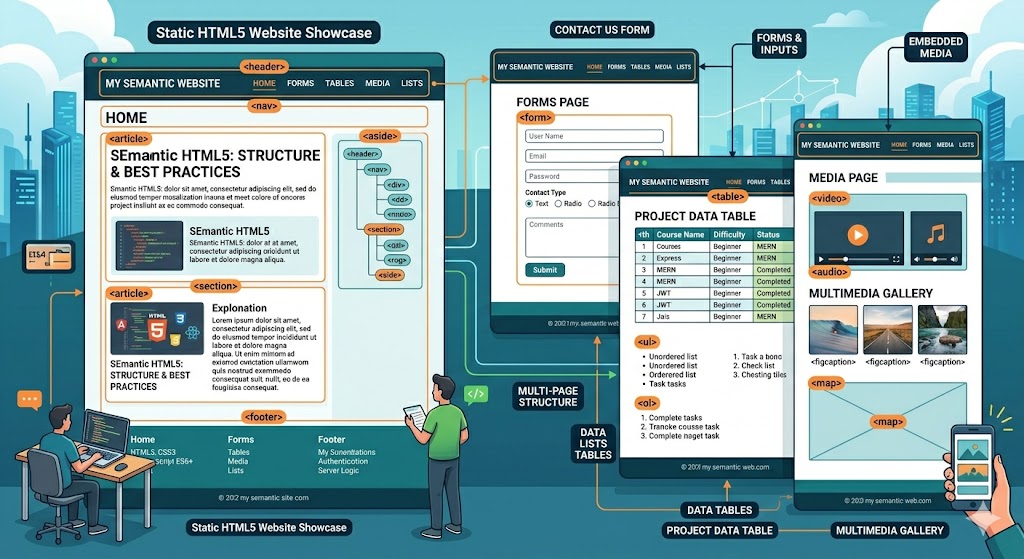
Step by Step Guide
Step 1: Create the Home Page
index.html
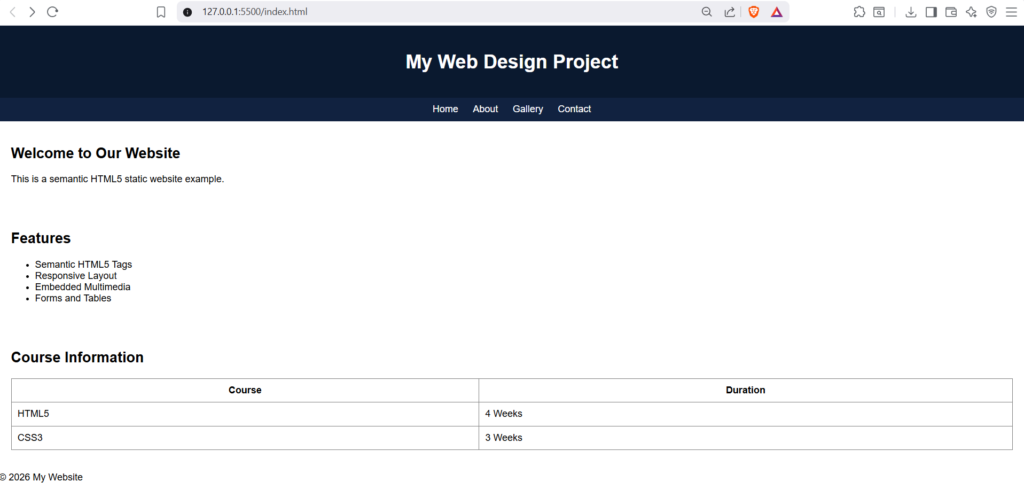
<!DOCTYPE html>
<html lang="en">
<head>
    <meta charset="UTF-8">
    <meta name="viewport" content="width=device-width, initial-scale=1.0">
    <title>My Semantic Website</title>
    <link rel="stylesheet" href="css/style.css">
</head>

<body>

<header>
    <h1>My Web Design Project</h1>
</header>

<nav>
    <a href="index.html">Home</a>
    <a href="about.html">About</a>
    <a href="gallery.html">Gallery</a>
    <a href="contact.html">Contact</a>
</nav>

<main>

<section>
    <h2>Welcome to Our Website</h2>
    <p>This is a semantic HTML5 static website example.</p>
</section>

<section>
    <h2>Features</h2>

    <ul>
        <li>Semantic HTML5 Tags</li>
        <li>Responsive Layout</li>
        <li>Embedded Multimedia</li>
        <li>Forms and Tables</li>
    </ul>
</section>

<section>
    <h2>Course Information</h2>

    <table border="1">
        <tr>
            <th>Course</th>
            <th>Duration</th>
        </tr>

        <tr>
            <td>HTML5</td>
            <td>4 Weeks</td>
        </tr>

        <tr>
            <td>CSS3</td>
            <td>3 Weeks</td>
        </tr>
    </table>
</section>

</main>

<footer>
    <p>© 2026 My Website</p>
</footer>

</body>
</html>
Step 2: Add CSS Styling
style.css
body {
    font-family: Arial;
    margin: 0;
    padding: 0;
}

header {
    background: #0a192f;
    color: white;
    padding: 20px;
    text-align: center;
}

nav {
    background: #112240;
    padding: 10px;
    text-align: center;
}

nav a {
    color: white;
    margin: 10px;
    text-decoration: none;
}

section {
    padding: 20px;
}

table {
    width: 100%;
    border-collapse: collapse;
}

th, td {
    padding: 10px;
}
Step 3: Create About Page
about.html
<!DOCTYPE html>
<html>
<head>
    <title>About</title>
    <link rel="stylesheet" href="css/style.css">
</head>

<body>

<header>
    <h1>About Us</h1>
</header>

<section>
    <h2>Who We Are</h2>

    <p>
        We provide web development tutorials for beginners.
    </p>

    <ol>
        <li>HTML5</li>
        <li>CSS3</li>
        <li>JavaScript</li>
    </ol>
</section>

</body>
</html>
Step 4: Create Contact Form
contact.html
<!DOCTYPE html>
<html>
<head>
    <title>Contact</title>
    <link rel="stylesheet" href="css/style.css">
</head>

<body>

<header>
    <h1>Contact Us</h1>
</header>

<section>

<form>

<label>Full Name</label>
<br><br>

<input type="text" placeholder="Enter name">
<br><br>

<label>Email</label>
<br><br>

<input type="email" placeholder="Enter email">
<br><br>

<label>Message</label>
<br><br>

<textarea rows="5"></textarea>
<br><br>

<button type="submit">Submit</button>

</form>

</section>

</body>
</html>
Step 5: Add Multimedia Elements
gallery.html
<!DOCTYPE html>
<html>
<head>
    <title>Gallery</title>
    <link rel="stylesheet" href="css/style.css">
</head>

<body>

<header>
    <h1>Gallery</h1>
</header>

<section>

<h2>Image Example</h2>

<img src="images/sample.jpg" width="400">

<h2>Video Example</h2>

<video width="400" controls>
    <source src="videos/demo.mp4" type="video/mp4">
</video>

<h2>Audio Example</h2>

<audio controls>
    <source src="audio/song.mp3" type="audio/mpeg">
</audio>

</section>

</body>
</html>
Advantages of Semantic HTML5
- Better SEO : Search engines understand your website structure better.
- Improved Accessibility : Screen readers can easily navigate the content.
- Cleaner Code : Code becomes easier to read and maintain.
- Mobile Friendly : Works better with responsive design techniques.
Common Mistakes Beginners Make
|
Mistake |
Solution |
|
Using too many <div> tags |
Use semantic tags |
|
Missing alt text in images |
Always add alt attribute |
|
No responsive viewport |
Add viewport meta tag |
|
Improper heading order |
Use H1 → H2 → H3 correctly |
Summary
Creating a multi-page static website using Semantic HTML5 is one of the best ways to start learning frontend development. It helps beginners understand webpage structure, SEO-friendly coding practices, multimedia integration, and responsive design concepts.
By mastering semantic HTML, you build a strong foundation for advanced technologies like:
- Bootstrap
- Tailwind CSS
- React
- Next.js
Start building projects regularly, improve your frontend skills, and gradually move toward full-stack web development.
Click Here to Download Example
Output of Example